Penguins!

We're having a ton of fun learning about penguins! It's wonderful teaching pre-k because they haven't done any of my favorite activities yet - there's no downer like preparing an activity and then having a kiddo yell out "Oh we did this last year!" Since my littles are brand new to school I get to expose them to everything :)
We've been dancing to the Penguin Dance by Jack Hartmann and the Learning Station's version - the jury is still out on which one we prefer - some kiddos love sticking their tongues out while others like making the penguin noises!
In our sand & water table we practiced perseverance by trying to melt ice! I prepared 3 containers of ice for the table, with blue, white and green gems of varying sizes and a Penguins TOOB like this one:

I froze the water in stages so that the materials were spread through each layer - that gave the kiddos incentive to keep working because they could see there were more things still embedded further down in the ice. I added a touch of blue food coloring to some of the layers, for visual appeal.
I used a Sharpie to write letters on each gem, but for some reason most of the letters washed off in the ice/water. When first frozen the letters showed up just fine, but by the time the ice melted all of the letters mysteriously vanished. Sad to think that the mighty Sharpie was conquered by cold water! I'm trying to think of an alternative or what I did wrong that the Sharpie came off so easily, if anyone knows of something else that will stay better please let me know!
I picked up some tools at the Dollar Tree for the kiddos to use to explore the ice. The basters are great for exercising little hands, as are the squeeze bottles. Wringing out the sponges was a lot of fun and again, great for fine motor skills! The kids explored friction while using the scrub brushes. I chose not to use salt - mainly because with the cold weather we all have dry hands and I was thinking the salt water would sting any little cracks and "owies". I also wanted the kids to have to work for a while at melting the ice to build up their patience, so we'll have to do a ice melting experiment with salt at a later date!
I included some cheapo wash clothes from Walmart so that they could wipe up any spills quickly - although we discourage splashing and try to keep the water in the table, there's always some drip. One of my rules is that the kids have to be able to clean up their center by themselves, so it's their job to make sure the floor is wiped up, all the sponges are wrung dry and the bottles emptied at the end of each center time. This gives them more ownership over the center and materials - you're less likely to be wild with the sand or water if you know you have to clean it up. It also makes the custodians less likely to complain about our sensory table!
After center time was over each day, I scooped up the remaining ice and refroze it. This was partly to ensure each child had a chance to explore the ice and also to teach perseverance - they couldn't get all the gems and penguins out in one go and had to keep coming back and working at the task. It took us 3 days to get all of the ice melted!
Once we had enough water in the table from the ice melting, I stopped filling up the squeeze bottles and the children had to fill their own using the tools at hand. They tried wringing the sponges over the bottles, using the ice cream scoopers or just dipping the bottle sideways through the water, but they soon learned that the basters were the most efficient method for filling the bottles!
On the 4th day I added some Styrofoam "ice floes". I didn't have any Styrofoam laying around at home so I had to purchase a sheet of it at Hobby Lobby - in the future I'm going to be saving every scrap of styrofoam I see because holy moly it was $8 to buy 1 sheet! No wonder companies charge so much for shipping and handling if that's the going rate for packaging materials lol!
The kids do love playing with it though - soon our penguins were laying "egg" gems and slipping and sliding on the "ice". The tools still come in handy as well - nothing like using a squeeze bottle to make it "rain" on the penguins!
 
We've played a lot with my Penguin Rhyming game. I always introduce it in whole group by passing out the cards and having the kiddos walk around to find their match. Once we've played it whole group a few times it goes to a center and the kiddos practice matching up the rhyming pairs. Then we did our cut n paste sheet so I had a quick assessment of who was still having difficulty with the concept. Most of my kiddos are good at rhyme recognition and are able to work on rhyme production now!
http://www.teacherspayteachers.com/Product/Penguin-Rhyming-Match-up-1625127

If you'd like to win your own copy of the game, rustle up a comment below and tell me your favorite thing to put into your sensory table!

Letter Recognition & Fine Motor Skills!

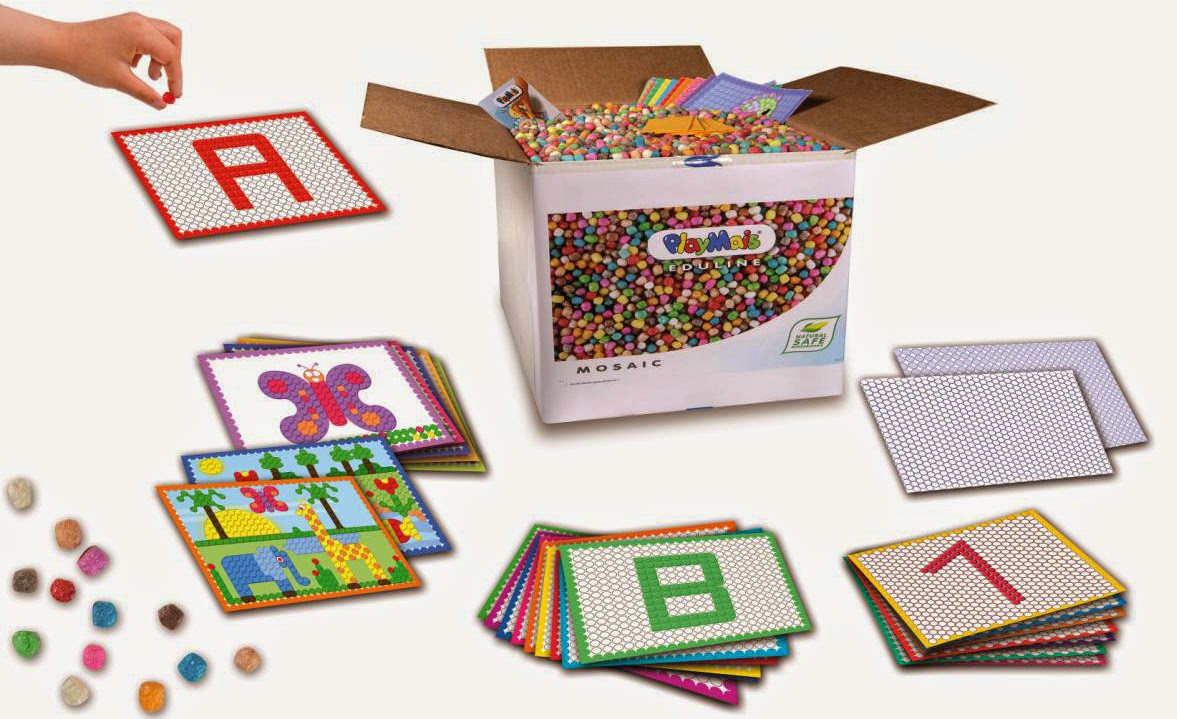
We are back into the swing of things and I have so many ideas to share with you! One of our new activities is PlayMais. Have you heard of it?! I first saw it at the I Teach K! convention in Las Vegas and I was hooked - first it's a ton of fun and secondly when I ordered it they shipped it to my home so I didn't have to figure out how to fit it in my suitcase!

PlayMais is a German company and the pieces are completely biodegradable AND allergy safe! Even my little guy, Sullivan, who is allergic to EVERYTHING can play with it! Because, you know, at some point, someone is going to stick a piece in their mouths! They're also big on reducing packaging waste, so when my box came it contained nothing but the PlayMais pieces and the worksheet book - no bag or anything, just a box filled to the brim with little cornstarch pieces!

The pieces are about the size of a bean and made of maize, water and food coloring. They stick together and to just about anything when they're damp. The box comes with a few pieces of felt - I get it wet and wring it out and then my students dab their pieces on it to moisten them.
 
My pack came with an activity book with sheets for each letter, numbers 0-10, about 5 pages of shapes and then some mosaic pictures. I decided to laminate my pages to make sure they held up, considering moisture is involved. I just used the paper cutter to chop the pages off the binder ring and laminated each sheet.
Then I poured about 1/8 of my box into a plastic container with a lid and introduced it to my class.
They LOVED it! Seriously, every day this week this center has been FULL! At first they chose the first letter of their names, but after that they started picking letters in their friends names or random letters and it's been great for letter recognition. When the students come to the center I have them identify which letter they want to work on - then we quickly rifle through all of the pages until we find the correct letter. I emphasized that we always start our letters at the top, so it's reinforcing correct letter formation.
My students' favorite part is getting to pick up their sheet when they're done and have the pieces defy gravity and stick to it!
We even got in some math practice because they naturally started sorting the different colors and patterning with them.
This little guy's favorite color is red so you can see he picked out a lot of red pieces :)

Not only is this great for letter recognition, it's fabulous for helping to develop those fine motor skills! The kids use a pincer grip to pick up the pieces and they have to be pretty meticulous to get the pieces into the right spot without knocking the others over. Every student who has come to this center has been successful - sometimes they can only complete the uppercase letter during their time at the center, while others can complete multiple letters, but they have all thoroughly enjoyed doing what they can.

The best thing is that at the end of center time they simply knock the PlayMais pieces off the sheet and back into the container to be reused! Although some have gotten a little smooshed (who can resist pinching a few?!) our container is going to last for ages since they're reusable! Eventually I will add the number cards to the center, and the shape cards and probably by the end of the year I will encourage 3d creation with the pieces, but for now, this is a fun way for my students to work on fine motor skills and letter recognition!

If you'd like to order directly from the company, check out the Education Box here!

I'm off to work on some Penguin Emergent readers - when they're finished I'll announce it on FB and you'll be able to grab them for 50% off for the first 24 hours! Have a great night!

A Fun Activity For Learning Letters/Sounds

I have to share something super exciting for me - my class is doing amazingly awesome in learning their letters and sounds! Right before our break I did an ELQA assessment (our district adopted ELQA for our pre-k classes) on all of my kiddos. ELQA assesses upper and lower case letter recognition, rhyme recognition and production, letter sound knowledge as well as receptive and expressive vocabulary. Not only is my class on target, I have some pre-k kiddos who will make their kindergarten teachers weep tears of joy!

As I was assessing letter and sound recognition, I could tell that one activity we do is having a huge impact! Many of my students would look at a letter and shout out "B is for Braylon!" or "P is for Parker!" and were then able to make the corresponding sound. This all ties back to a power point show I made at the beginning of the year to help us learn everyone's names and to help everyone recognize at least the first letter of their name.

I took a picture of each of my kiddos in front of a black board with the alphabet card with the first letter of their name:
As an example, this is my son Tommy, so for him we would say "T is for Tommy, turtle and toothbrush /t/ /t/  T."

At the beginning of the year I only had my students' pictures in the show.  I have several kiddos whose names begin with J, K or L but we would do each of them the same way "J is for Jack, jam and jellybeans  /j/ /j/  J." followed by the same thing for Jace and Joslynn.

Once we knew all of our freinds names and were starting to pick up the 12 or so letters in the show, I started adding pictures for the other letters. I started with my sons because my students are familiar with them, then added my assistant, Ms. Davis for D. Inevitably though, I had letters that I couldn't match up with anyone.

That's when I took pictures of just the alphabet cards and then added a cartoon character to the picture on my computer. This is HoHo from the cartoon Ni Hao, Kai-Lan. I tried to use cartoon characters that my students were familiar with, which meant a bit of stalking Nickjr and PBS Kids. So we still had each of the students' slides, but now we had a slide for every letter of the alphabet!

We watch this on the Smartboard at least once a day - sometimes more often if we have a few minutes of transition time to fill. This, combined with letter activities from my Alphabet Letter Sounds Pack and my Alphabet Emergent Readers was really helping my kiddos recognize letter. But, seeing the same pictures can get boring after a while, and some of my kiddos were starting to "tune out". So I decided to throw in some random, seasonal friends to renew my students' interest:

Santa and Olaf were added, as well as Frosty, the Grinch and Rudolph!

My students LOVED these new characters, and were once again enthralled for the whole 3or so  minutes of the show.  Obviously once we come back in January,  Santa & friends will have to move on, but in their place will be Tacky the penguin! I'll be updating the show throughout the rest of the year as well - I'm thinking a groundhog, Cupid, George Washington and Abraham Lincoln for February, leprechauns and Dr. Seuss characters in March etc. 

So there we are - a fun way to expose your students to letters and sounds,  but the key is keeping it fresh throughout the year. The great thing is that it takes just a few minutes to add in another slide or delete old ones, so keeping the slide show updated is not a big chore, yet it really makes a big impact!


Popular Posts