All Things Penguin! (& Groundhog FREEBIES!)

Penguins! Are you tired of them yet? We aren't! We are still going strong with this theme, and those little tuxedo-ed birds are popping up everywhere in the classroom:


During Math we did this fun "5 Little Penguins" craftivity which incorporated making sets, graduated order and counting. Oh, and goldfish eating! That's the best type of activity, don't you think?
These were inspired by this pin and were surprisingly easy to do as a whole class. Since this was more of a following directions/math activity, I went ahead and pre-cut the pieces. Usually I like to give the kids fine motor practice by making them cut out their own, but in this case I opted for time-saving.
  
I passed out the pieces to each penguin separately, and we put it together and glued it in place before moving on to the next penguin. We then numbered the penguins and glued on the appropriate number of fish. The eyes we did with a Q-tip and white paint since I didn't feel like cutting out that many circles.
Aren't they adorable?!

Also in Math, we've been doing our Penguin Math Readers:
https://www.teacherspayteachers.com/Product/Penguin-Early-Math-Emergent-Readers-1659330
This book focused on number words and numerals for 1-5. I love doing pocket chart stories like this during math because it helps get in those print concept skills!

https://www.teacherspayteachers.com/Product/Penguin-Early-Math-Emergent-Readers-1659330
We generally do each pocket chart version for a few days and then the students color their own versions to take home.
https://www.teacherspayteachers.com/Product/Penguin-Early-Math-Emergent-Readers-1659330

https://www.teacherspayteachers.com/Product/Penguin-Early-Math-Emergent-Readers-1659330
My students loved this one, and we got to talk about rhyming words while introducing basic subtraction!
https://www.teacherspayteachers.com/Product/Penguin-Early-Math-Emergent-Readers-1659330

If you read last week's post about "Sneaking in the Learning", you'll remember I like to do intervention activities during free choice center time, so I often create something fun that everyone will want to do. That way I know my "target" will freely choose to come play at the activity I want them to work on!

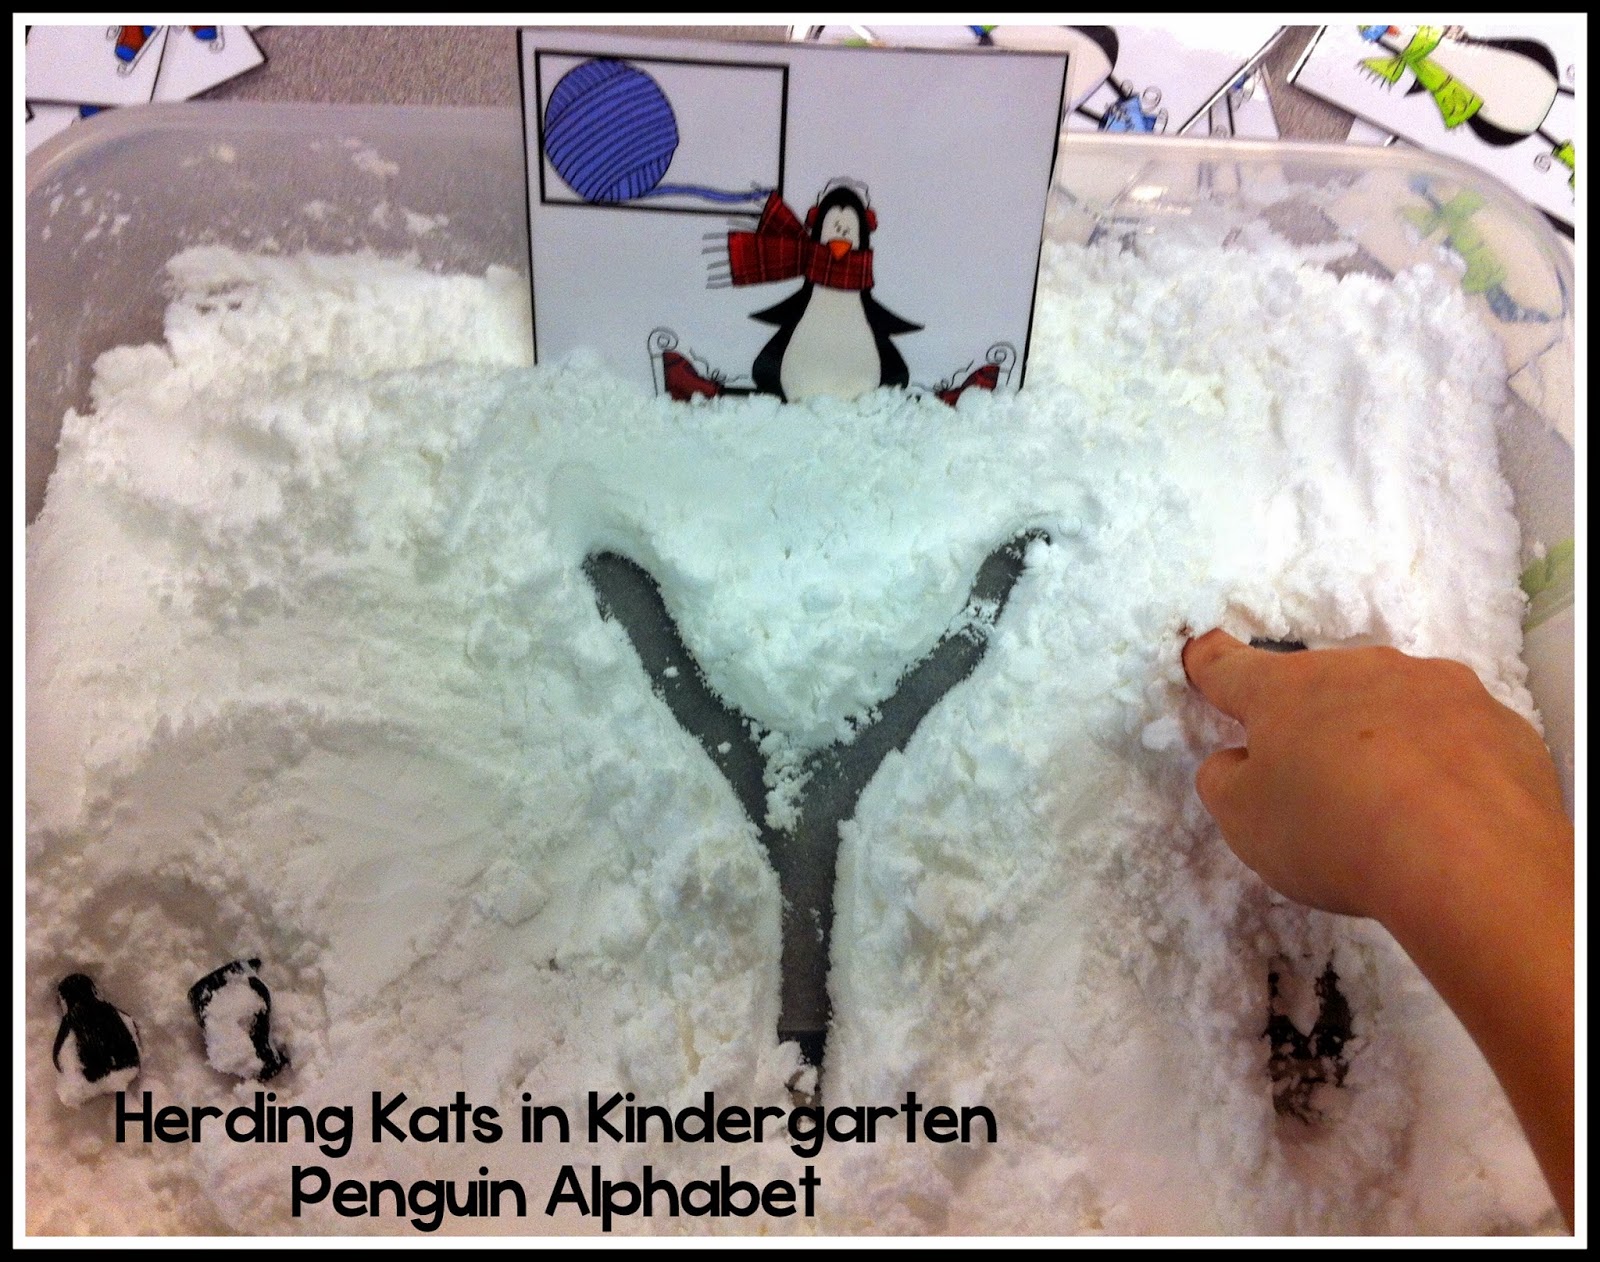
This week I  created a fun Penguin activity for letters/sounds! I made "snow" by mixing baking soda and white Suave conditioner (not the coconut one - I figured that would be too odd for snow) in a shallow plastic bin. Then I added some little penguin counters and the cards from my Penguin Alphabet Match-Up pack.
 
https://www.teacherspayteachers.com/Product/Penguin-Themed-Alphabet-Match-Up-1625055
With my student who is struggling the most, I focused on simple uppercase letter recognition. I would write the letter in the snow with my finger, and my little guy would have the penguin trace the same path while repeating the letter name.

https://www.teacherspayteachers.com/Product/Penguin-Themed-Alphabet-Match-Up-1625055
One of my other students matched up the lower and upper case letters and then wrote both in the snow.

https://www.teacherspayteachers.com/Product/Penguin-Themed-Alphabet-Match-Up-1625055
Another student matched the beginning sound card to the letter card and then wrote the letter.

https://www.teacherspayteachers.com/Product/Penguin-Themed-Alphabet-Match-Up-1625055


https://www.teacherspayteachers.com/Product/Penguin-Themed-Alphabet-Match-Up-1625055
And one of my high fliers was able to take a beginning sound card and write the beginning letter on her own!
https://www.teacherspayteachers.com/Product/Penguin-Themed-Alphabet-Match-Up-1625055

A fun, simple activity that reached every level in my class and had students begging for a turn!

I also solved the problem of the disappearing Sharpie! When I added my glass gems to our icy sand and water table, the letters I had written on them quickly rubbed off! So much for permanent markers!
I decided to switch up our table again (generally we do each medium for 2-3 weeks or until I notice that the materials aren't engaging the students any more. 

 In this case we had ice in the table for a week, followed by 2 weeks of water play. 

More water was starting to make its way onto the students and the floor ~ my hint that something needed to be changed!
So I dumped the water and added shredded paper "snow". I took the gems and used a generic permanent marker and then painted over it with clear nail polish. Those letters won't come off no matter how much they're rubbed now! The best part is that they fall all the way to the bottom of the table so the students really have to search for them!
I forgot to take pictures, but today I also added scissors. I had a quartet of students who were thrilled with the chance to cut up the shreds even more and I was thrilled that they got to practice the correct scissor grip!

Our 100th Day of school is Monday, and in the madness of prep for that, I totally forgot about Groundhog's Day! Luckily I have TWO FREEBIES from last year that are low-prep! I'm so happy to have these to fall back on so I can incorporate them into our 100th Day festivities with little extra work! You can grab them at my TPT store by clicking the pictures:
https://www.teacherspayteachers.com/Product/Groundhog-Day-Roll-And-Cover-Addition-and-Subtraction-Game-196100

https://www.teacherspayteachers.com/Product/FREE-Groundhog-Day-class-graph-and-response-sheet-194124

Alright, time to start cleaning the house & hopefully sneak a nap in! Have a great weekend!

Sneaking in the Learning! (Freebie)

I wanted to share with you how I sneak in learning during our free choice center time. Of course I set my centers up so that students are learning something at each one - whether it's developing fine motor skills at play-dough center or learning about symmetry and engineering concepts at our Lego table, each center is about so much more than "just play". But, sometimes a student needs practice on a  specific skill - something that requires 1 on 1 or small group intervention. The best way I've found to do this is by sneaking that skill into a center!

Sometimes this means going to Lego table and talking about letter names and sounds as I build the letters from Legos. The student invariably wants to see what teacher is building and we have a fun conversation as I reinforce a few letters via the blocks. Soon they're building their own letters - and brainstorming words that start with it!

Sometimes I might have to head over to the Pipe Builders and encourage some sorting and patterning - or even number building! 


Sometimes I get to indulge in some play-dough therapy while we create a pattern or count out how many "cookies" they have made me (thank goodness pretend cookies don't have calories!)

I try to meet the student at the center they've chosen, and just work a little extra learning into what they're already doing. Depending on the student it might be 5-10 minutes and then I move on. Sometimes they continue the activity after I leave, sometimes they've had their fill and they go back to their original play.

Sometimes though, I need a student in a specific center to practice an activity. I have a few little ones who are working on making sets. Rather than go to different centers and try to incorporate that skill into Home Living, Sand & Water Table AND whatever other center they choose, I create an activity that will be fun and engaging and set it up at Math or Letter Center. Generally, when I introduce something new, everyone wants to try it. So of course I maneuver it so that the students who need that particular skill the most get to choose their center first. The majority of the time they self-select the activity I wanted them to!
 
So today I introduced my Making Sets Snowmen - complete with sparkly star "buttons" (they're actually beads from Oriental Trading!). 
The object of the activity is to place the correct amount of buttons on each snowman, based on the number on their hat. This little friend gave the activity a big "thumbs up"!
All 3 of my "targets" voluntarily chose the center, as well as a handful of other kiddos. This is perfectly fine - it won't hurt them to reinforce the skill, and sometimes they can challenge themselves, like this little guy who created a pattern as he was making his set!

  If you want to grab these cuties, click here to download them for FREE! And then check out other Friday Freebies over at Teaching Blog Addict!
http://www.teachingblogaddict.com/2015/01/freebie-friday-january-23rd.html

We also started doing a "Crash 'Em Up!" game at our Block Center. I have a few boys who really love that center and they could all use extra reinforcement with letters/sounds. So I created a fun activity with some simple wooden cubes I had lying around from who-knows-what-project. I wrote letters on them with a Sharpie and brought them to the Block Center is a little cup. I had the boys help me set up our trains on two hills and had them stack up 3 blocks at the bottom of each hill. Then I call out a letter, my boys point it out and then they get to send the correct train down its hill to crash into the letters! I caught it on video today:

The beauty of this activity is that I can change it depending on which kiddo comes to the center. For some that are still working on identification, I call out a letter name. For other kiddos I call out the letter sound, and with still other kiddos I can make cvc word towers and have them crash the train into the correct word.

Every time I do this, I'm reminded of those recipes that try to "sneak" veggies in so kids don't notice them - like pureeing carrots into spaghetti sauce! What's your favorite way to "sneak" in the learning?

Penguin Footprints

We made the cutest Footprint Penguins this week, and I had to share :)
I've seen them all over the place, but it took me a bit to figure out how to do them - I saw tons of pictures of finished products, but none of the actual process! I'm not sure if this is the way you're supposed to do it, but I found that if I actually painted the white on my students' feet, it wouldn't transfer to the paper unless they were exceptionally flat-footed.
We ended up painting the outside edges and toes of each child's foot and adding the white middle by hand.
The "flippers" are fingerprints!

We added "snow" by mixing shaving cream and glue. I either got the proportions wrong or using $1 Store shaving cream was a no-no because it didn't puff up as much as I remember it doing last year. (Yes, I've done shaving cream snow before and yes, I have no clue how I did it...my brain willfully withholds these kind of fun facts from me, just to watch me fumble I think.)

I allowed each kiddo to choose their own "beak" and googly eyes from a variety of shapes and sizes. I try to give them as much ownership as possible in these kind of projects so that we don't end up with 20 carbon copies.
They also got to paint as much "snow" as they wanted...some chose the straight line effect.....

Other penguins were experiencing blizzard-like conditions...


This sweet girl went for symmetry...exactly 5 snowflakes on either side of the penguin...

And this penguin is experiencing very localized weather...

And, as a warning, not all children are going to be thrilled about having their foot painted. Be prepared with an alternate version for those sweeties. This little guy thought I was completely nuts to want to put paint on his foot, but he was tickled to get his hand painted instead!

These sweet penguins are cheering up our hallway now, and everyone loves them. I can't wait to add our snowmen to them next week!

Bright Ideas!

I'm joining up with the Bright Ideas Blog Hop again today! I have two ideas to share with you today!

First up - getting the paper off of crayons! If your class is anything like mine, at this time of year the crayons are looking pretty sad - teeth marks, broken shafts and missing tips are par for the course...particularly at some tables. Not that I'm pointing fingers (blue table!)

There are all kinds of things you can do with those broken crayons. Like those lovely melted crayons projects. I'd show you one, but mine turned out to be more along the lines of Pinterest Fail than a piece of art. But, if you feel that melted crayons are in your future for whatever reason, you're going to have to nakify the crayons first.

Heck, even if you're out of new crayons and your students are going to have to make do with what they have until the last bit of scribble is choked out of each crayon nub, you're probably going to want to nakify your crayons anyways, just to cut down on the annoying scraps of paper that will litter your room as the children painstakingly peel each miniscule crumb of crayon. Sure you could probably get away with having your students tear the paper off all of the crayons as a "fine motor skill activity" but just in case you want a faster, neater way of doing it, here goes:

Yes, I sacrificed nice crayons for this. Yes, it hurt my teacher heart, but I actually ditched all of my yucky crayons before Christmas Break (although you really can't tell by looking in blue table's caddy).

Put your crayons in some type of watertight container. This gives you the added benefit of being able to clean out whatever container usually holds your crayons so you can find those odd manipulatives or game pieces that have been missing for weeks, not to mention the odd tissue or bandaid that didn't find it's way to the trash. Pour in enough water to cover the crayons completely and let them soak.
Soak for a while - the water has to have a chance to get through all of the layers of paper. I actually let mine sit for a while so that I could try to slide the paper sleeves right off the crayons:

Yes, they did multiply...what did you expect when you left naked crayons in a container by themselves?!


I'm planning to reuse them as "invisible" crayons on April 1st...

Now I just have a few random tidbits:

"I'm your teacher, not a dj." This is my mantra. At first I have to explain the concept of a dj, and how you can call in to request a song on the radio, and I have to repeat the mantra over and over in the beginning. But, eventually they learn that the best way to get me to NOT play their favorite Brain Break is by yelling it out at carpet. Quiet hands get their choice of song...unless I just feel like doing Pop See Ko again and exercise my prerogative as the Keeper of the Keyboard.

Vaseline & Q-tips - Do your kiddos have clown lips? You know, that ring of chapped skin around their mouths that is reminiscent of PennyWise from Steven King's "It". Or those tiny cracks in their hands from frequent flu-season hand washing? Banish the tubes of chapstick that they either a) eat or b) fiddle with constantly or c) lose every 5 minutes, causing them to panic. Get a tub of Vaseline (generic works as well) and some q-tips! If a child has chapped lips, dip a q-tip in the Vaseline and when they're done with it they dispose of it, keeping the Vaseline germ-free. A smidgeon of Vaseline on their little hands soothes dry skin without the sting of fragranced lotions. Also, the Vaseline doesn't taste good so they generally don't ask for it unless they really need it, unlike flavored lip balms which sometimes exacerbate the problem because they lick the taste off their lips so much! I keep mine in a basket along with some extra gloves for recess time.

Those are my tips for January! If you enjoyed this Bright Idea, please consider joining me on Facebook or TPT for more great ideas. For more Bright Ideas from a variety of other bloggers, please browse through the link-up below and choose a topic/grade level that interests you! 

Penguins!

We're having a ton of fun learning about penguins! It's wonderful teaching pre-k because they haven't done any of my favorite activities yet - there's no downer like preparing an activity and then having a kiddo yell out "Oh we did this last year!" Since my littles are brand new to school I get to expose them to everything :)
We've been dancing to the Penguin Dance by Jack Hartmann and the Learning Station's version - the jury is still out on which one we prefer - some kiddos love sticking their tongues out while others like making the penguin noises!
In our sand & water table we practiced perseverance by trying to melt ice! I prepared 3 containers of ice for the table, with blue, white and green gems of varying sizes and a Penguins TOOB like this one:

I froze the water in stages so that the materials were spread through each layer - that gave the kiddos incentive to keep working because they could see there were more things still embedded further down in the ice. I added a touch of blue food coloring to some of the layers, for visual appeal.
I used a Sharpie to write letters on each gem, but for some reason most of the letters washed off in the ice/water. When first frozen the letters showed up just fine, but by the time the ice melted all of the letters mysteriously vanished. Sad to think that the mighty Sharpie was conquered by cold water! I'm trying to think of an alternative or what I did wrong that the Sharpie came off so easily, if anyone knows of something else that will stay better please let me know!
I picked up some tools at the Dollar Tree for the kiddos to use to explore the ice. The basters are great for exercising little hands, as are the squeeze bottles. Wringing out the sponges was a lot of fun and again, great for fine motor skills! The kids explored friction while using the scrub brushes. I chose not to use salt - mainly because with the cold weather we all have dry hands and I was thinking the salt water would sting any little cracks and "owies". I also wanted the kids to have to work for a while at melting the ice to build up their patience, so we'll have to do a ice melting experiment with salt at a later date!
I included some cheapo wash clothes from Walmart so that they could wipe up any spills quickly - although we discourage splashing and try to keep the water in the table, there's always some drip. One of my rules is that the kids have to be able to clean up their center by themselves, so it's their job to make sure the floor is wiped up, all the sponges are wrung dry and the bottles emptied at the end of each center time. This gives them more ownership over the center and materials - you're less likely to be wild with the sand or water if you know you have to clean it up. It also makes the custodians less likely to complain about our sensory table!
After center time was over each day, I scooped up the remaining ice and refroze it. This was partly to ensure each child had a chance to explore the ice and also to teach perseverance - they couldn't get all the gems and penguins out in one go and had to keep coming back and working at the task. It took us 3 days to get all of the ice melted!
Once we had enough water in the table from the ice melting, I stopped filling up the squeeze bottles and the children had to fill their own using the tools at hand. They tried wringing the sponges over the bottles, using the ice cream scoopers or just dipping the bottle sideways through the water, but they soon learned that the basters were the most efficient method for filling the bottles!
On the 4th day I added some Styrofoam "ice floes". I didn't have any Styrofoam laying around at home so I had to purchase a sheet of it at Hobby Lobby - in the future I'm going to be saving every scrap of styrofoam I see because holy moly it was $8 to buy 1 sheet! No wonder companies charge so much for shipping and handling if that's the going rate for packaging materials lol!
The kids do love playing with it though - soon our penguins were laying "egg" gems and slipping and sliding on the "ice". The tools still come in handy as well - nothing like using a squeeze bottle to make it "rain" on the penguins!
 
We've played a lot with my Penguin Rhyming game. I always introduce it in whole group by passing out the cards and having the kiddos walk around to find their match. Once we've played it whole group a few times it goes to a center and the kiddos practice matching up the rhyming pairs. Then we did our cut n paste sheet so I had a quick assessment of who was still having difficulty with the concept. Most of my kiddos are good at rhyme recognition and are able to work on rhyme production now!
http://www.teacherspayteachers.com/Product/Penguin-Rhyming-Match-up-1625127

If you'd like to win your own copy of the game, rustle up a comment below and tell me your favorite thing to put into your sensory table!

Popular Posts